How to Resize Image in Procreate Without Losing Quality
Ever spent hours on a digital masterpiece, only to have it turn into a blurry mess when you try to resize it? You’re not alone. The key to resizing images in Procreate without losing quality is to start with a large canvas and use the Resample Canvas tool with the right Interpolation setting.
Initial Canvas Setup
Before we even touch the resize tools, let’s talk about the most important step: your initial canvas setup. Think of your digital art as being built from tiny squares called pixels. The more pixels you have, the more detail your image holds.
It’s always easier to make a large image smaller (downsizing) than to make a small image larger (upscaling). When you downsize, Procreate intelligently discards pixels. When you upscale, it has to guess what the new pixels should look like, which often leads to blurriness.
Pro Tip: Always create your canvas for the largest size you might possibly need. If you’re creating a piece for Instagram but think you might want to print it as a poster later, create it at the poster size and resolution first.
- For Print: Aim for 300 DPI (Dots Per Inch). This is the industry standard for high-quality printed materials.
- For Screens (Web, Social Media): 72 to 144 DPI is usually sufficient, but working at 300 DPI and exporting a smaller file is a safer workflow.
‘Resample Canvas’ Method
When you need to change the size of your entire artwork, the Resample Canvas tool is your best friend. It resizes both the canvas and your art at the same time, using smart algorithms to preserve quality.
Here’s how to use it:
- Duplicate Your Work: Before making any changes, go to the Gallery and duplicate your project. This gives you a backup if you’re not happy with the result.
- Open the Actions Menu: Tap the wrench icon in the top-left corner.
- Navigate to Canvas: Select the ‘Canvas’ tab.
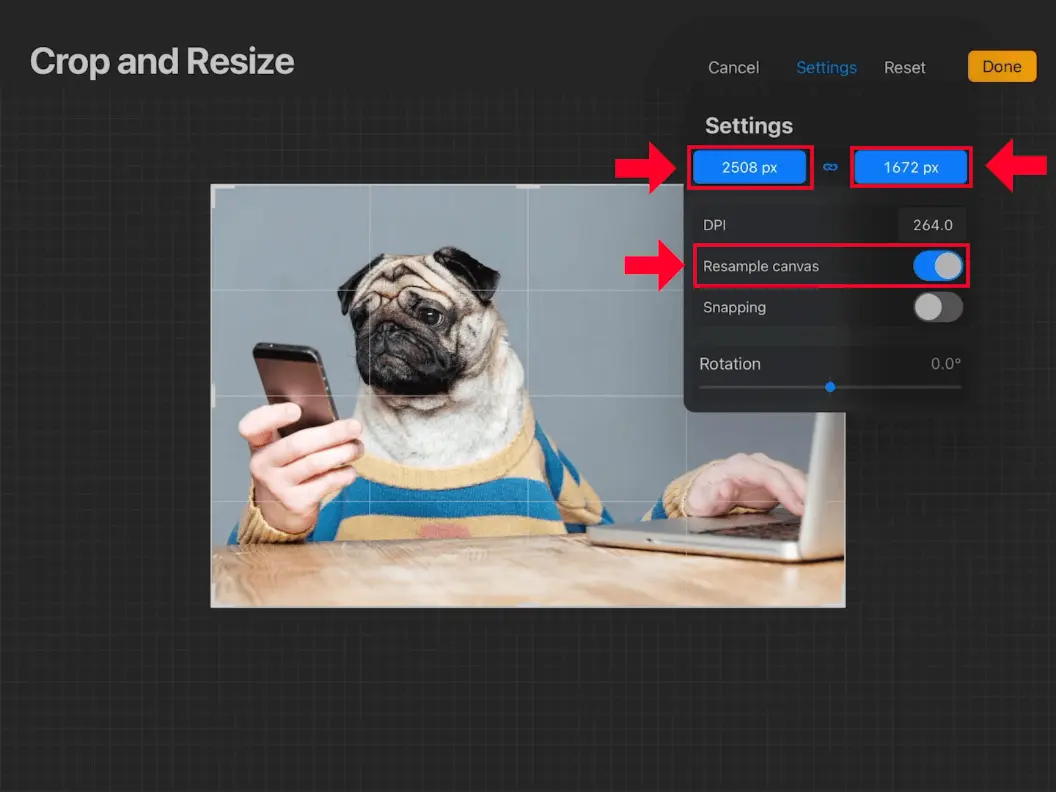
- Turn on Resample: Tap on Crop and Resize. At the bottom of the screen, make sure the Resample Canvas switch is toggled on. If it’s off, you’ll only crop the canvas, not resize the art.
- Enter New Dimensions: You can type in the exact pixel dimensions or change the DPI. To avoid distortion, make sure the small chain link icon between the width and height is locked.
- Choose Interpolation: Tap the Resample setting (it might say Bicubic by default) to choose your method. We’ll cover what these mean in the next section.
- Done: Tap Done to apply the changes.

Choosing Your Interpolation ‘Flavor’
When you resample, Procreate has to create or delete pixels. Interpolation is the mathematical method it uses to do this. Procreate gives you three “flavors” to choose from.
| Interpolation Method | Best For… | The Result |
|---|---|---|
| Nearest Neighbor | Pixel art and hard-edged graphics. | Very sharp, blocky, and “pixelated.” |
| Bilinear | A general-purpose middle ground. Good for quick adjustments. | Softer than Nearest Neighbor, but not as smooth as Bicubic. |
| Bicubic | Most artwork, especially paintings and illustrations with gradients. | The smoothest and highest-quality result, especially when enlarging. |
For 99% of resizing tasks, Bicubic is the one you want. It looks at surrounding pixels to make a highly educated guess, resulting in smooth transitions and the best detail preservation.
Resizing Specific Parts with the Transform Tool
What if you only want to resize one layer, like a character or an object? That’s where the Transform Tool (the arrow icon) comes in.
- Select the layer you want to resize.
- Tap the arrow icon to activate the Transform Tool.
- In the options at the bottom, make sure Uniform is selected to avoid squishing your art.
- Pinch to scale your layer up or down.
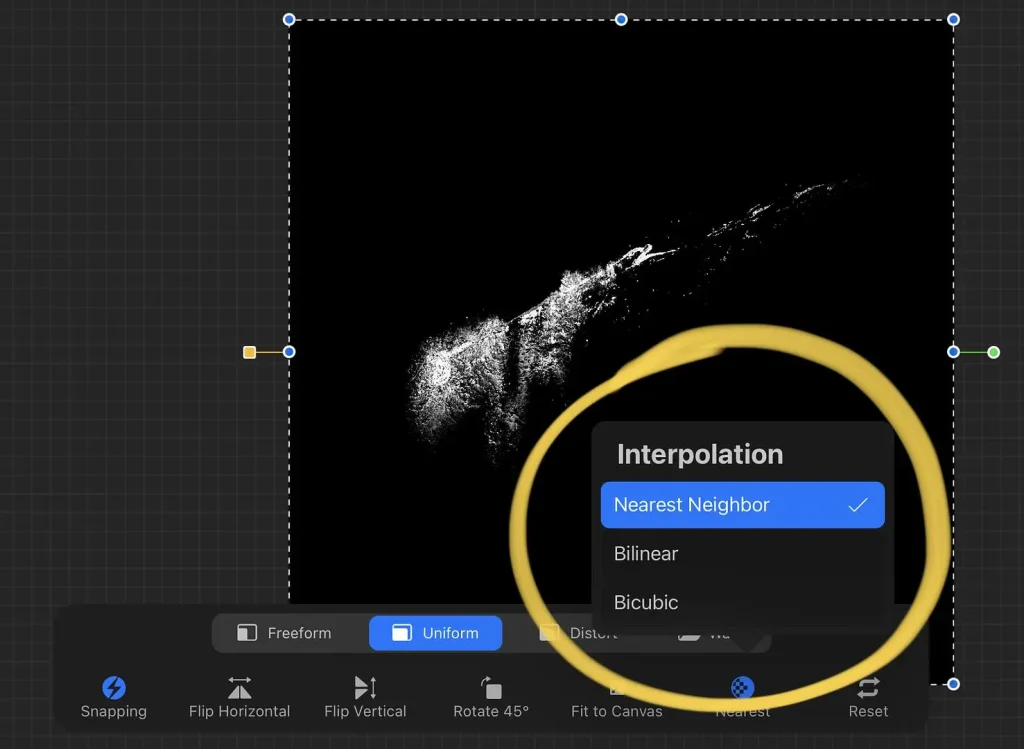
- Important: Tap the link icon at the bottom of the screen to open the Interpolation settings. Just like with Resample, you can choose Nearest Neighbor, Bilinear, or Bicubic. Again, Bicubic is usually your best bet for quality.

Video Tutorials – Resize Without Losing Quality in Procreate
Pro Tips
Keep these dos and don’ts in mind to get the best results every time.
View at 100%
After resizing, double-tap the canvas to view it at its actual size. This is the most accurate way to check for blurriness.
Sharpen Subtly
Resizing can sometimes soften an image. After you’re done, try adding a very subtle sharpen effect. Go to Actions > Adjustments > Sharpen and slide it up just a few percent (1-5%).
Use Vector Text
Procreate’s ‘Add Text’ feature is vector-based, meaning you can resize text as much as you want without any quality loss.
Don’t Drastically Upscale Small Images
You can’t magically create detail that isn’t there. Trying to turn a tiny 500×500 pixel sketch into a 4K masterpiece will always look blurry.
Don’t Forget to Lock Aspect Ratio
Unless you’re intentionally stretching your art, always keep the aspect ratio locked (the chain link icon) to prevent distortion.
Don’t Over-Sharpen
Too much sharpening creates ugly digital artifacts and harsh halos around your lines. A little goes a long way.
FAQs
What’s the best canvas size to start with in Procreate?
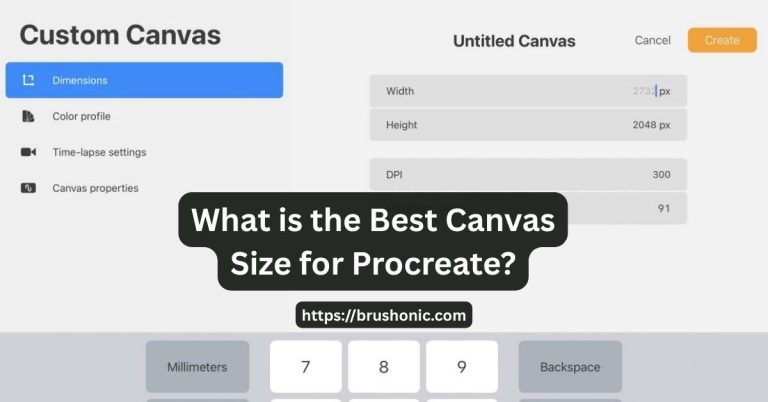
A great all-purpose size is 4000 x 3000 pixels at 300 DPI. This is large enough for a quality A4 print and can be easily downsized for any social media platform.
I tried to make my art bigger, but it’s still blurry. Why?
Even with the best tools, there’s a limit to how much you can enlarge a raster (pixel-based) image. Procreate’s Bicubic interpolation does an excellent job, but it’s still guessing. For the best results, always start with a canvas that is larger than your intended final size.
What’s the difference between resizing a layer (Transform) and the whole image (Resample Canvas)?
The Transform tool affects individual layers, allowing you to scale, rotate, and move specific elements within your canvas. Resample Canvas changes the dimensions of your entire project—all layers included—to a new size.
Conclusion
Resizing your art in Procreate doesn’t have to be a gamble. By starting with a high-resolution canvas and using the Resample Canvas tool with Bicubic interpolation, you have full control over the final quality of your work.
Now you can confidently prepare your art for any purpose, from a high-quality giclée print to a stunning social media post. So go ahead, resize with confidence, and share your incredible creations.
Enjoyed This? Don't Miss Out!
Get exclusive tips, new brush announcements, and a freebie every month.


